Integrating Megaport with Azure VeloCloud Solution (AVS)
You can use Megaport to create an Azure ExpressRoute Layer 2 connection between your on-premises or colocation-based infrastructure and your VeloCloud environment on Azure. You can also use ExpressRoute to connect to a cloud-only instance of Azure VeloCloud Solution.
Before you begin, ensure that you have created a Megaport connection, or Port. After you create the Port, you can connect a Virtual Cross Connect (VXC) from the Port to the virtual gateway associated with the Azure VNET infrastructure. A VXC is a point-to-point Ethernet connection between an A-End (your Port) and a B-End (in this case, your VeloCloud Cloud on Azure instance).
If you aren’t a Megaport customer, you can create a 10 Gbps, 100 Gbps, or higher Port in one of our global data centers/Points of Presence. If your company is not located in one of our PoPs, you can procure a last mile circuit to one of the sites to connect to Megaport. Contact Megaport for more information.
Note
If you require a Port in a different location to physically separate this solution from other existing traffic traversing your Ports, we recommend that you create a new one before proceeding.
How is VeloCloud implemented in Azure?
Azure integrates VeloCloud implementation into its platform using CloudSimple, a third-party vendor that provides VeloCloud-as-a-Service in public clouds. CloudSimple is fully managed, validated, and supported by VeloCloud and allows you to quickly implement a VeloCloud solution using familiar tools and services including vSphere, vCenter, vSAN, and NSX.
Setting up VeloCloud within Azure
To set up VeloCloud within Azure
-
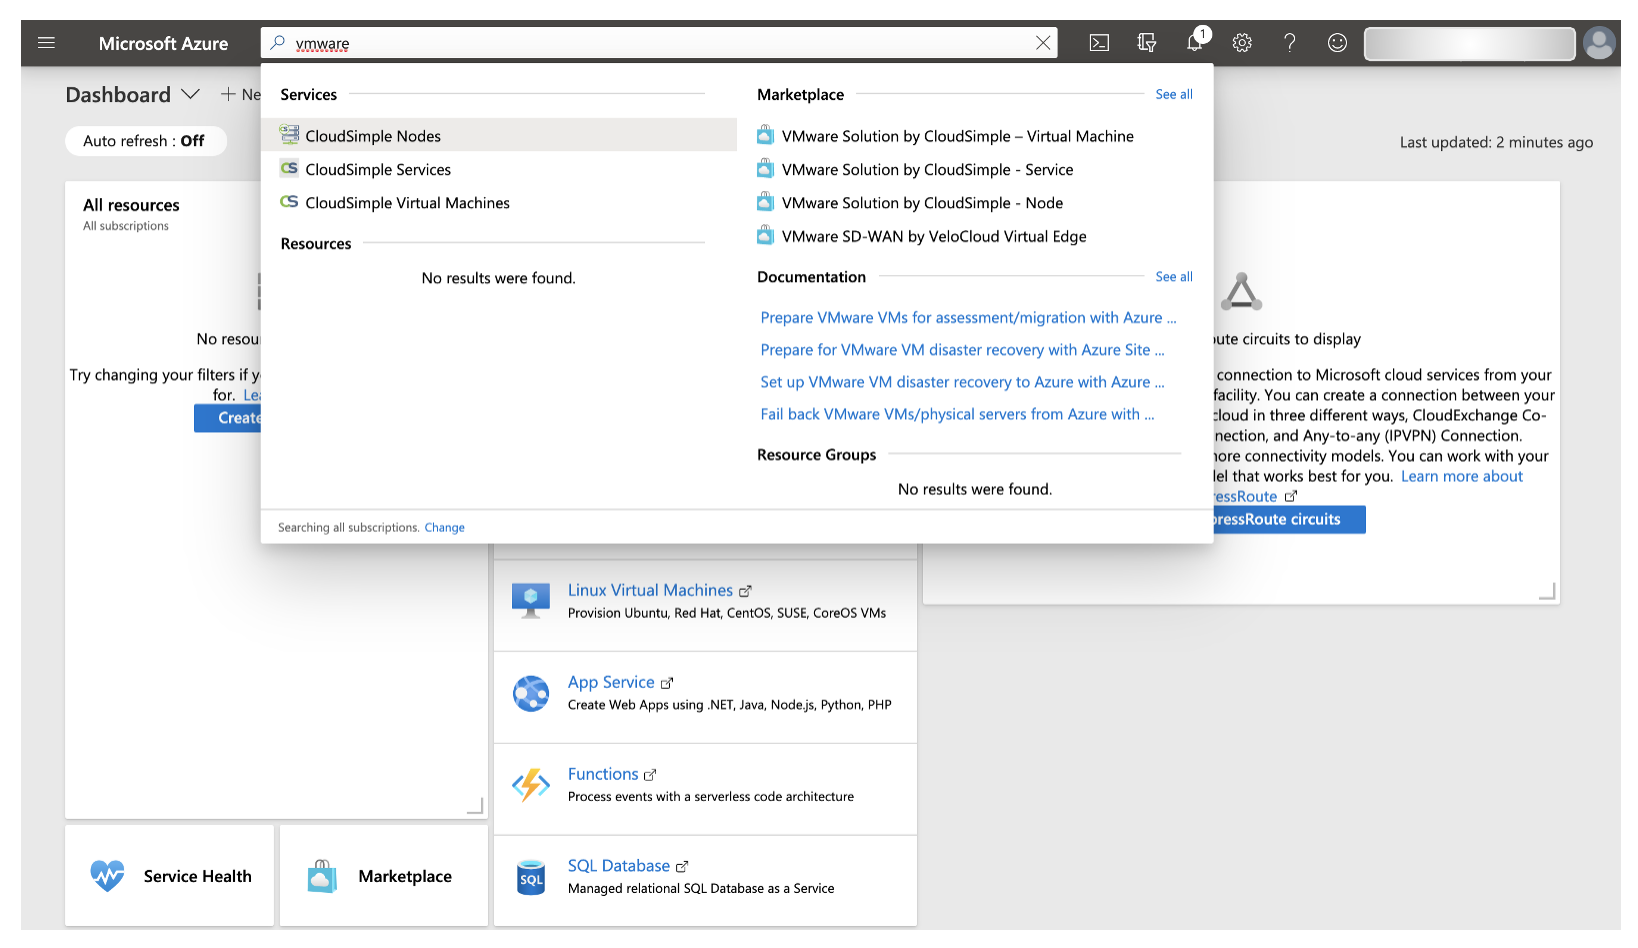
Log in to your Azure account and search for VeloCloud or CloudSimple.
-
Choose VeloCloud Solution by CloudSimple – Service from the search results.
-
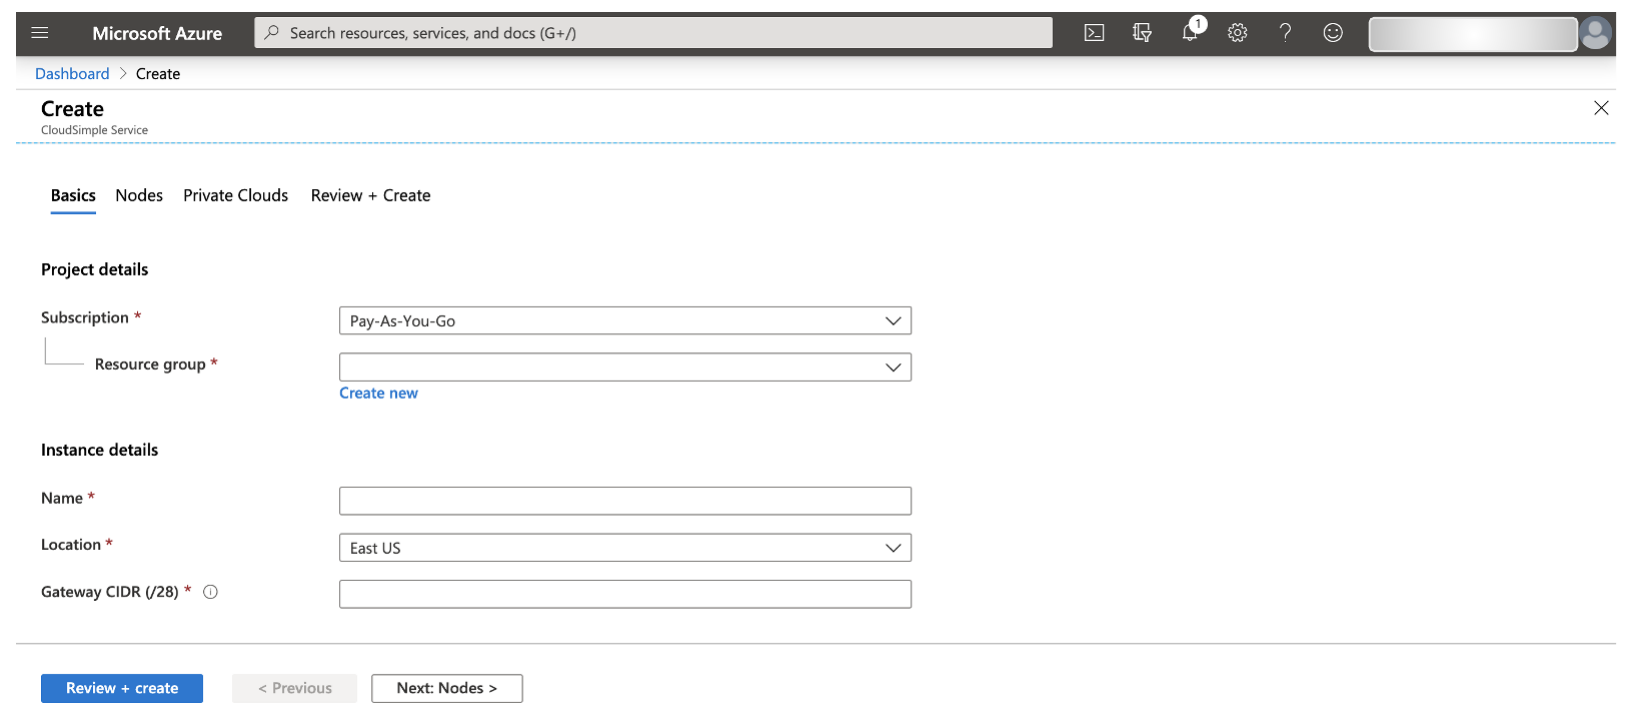
On the Create page, specify the project details:
- Subscription – Select the subscription where you want to create the service.
- Resource group – Select an existing Resource group or create a new one.
- Name and Location – Enter a name for the service and the location/region to implement it.
- Gateway CIDR (/28) – Enter a /28 IP subnet for the gateway. This IP block should be unique and not overlap with any other IP block associated with the CloudSimple environment.
-
Click Review + create.
-
Click Create to create the service.
After you have set up VeloCloud in Azure, you can perform any of the following optional procedures:
- Create Nodes in the environment for pay-as-you-go capacity.
- Implement a Private Cloud using CloudSimple to create an isolated VeloCloud stack within Azure that will support ESXi hosts, vCenter, vSAN and NSX.
- Use CloudSimple to create virtual machines in Azure.
Creating an authorization on the ExpressRoute circuit
To use ExpressRoute for connectivity between your on-premises infrastructure and VeloCloud on Azure, you must create an authorization on the ExpressRoute circuit. You will then provide this authorization to CloudSimple.
To create an authorization on the ExpressRoute circuit
-
Log in to the Azure console and search for ExpressRoute.

-
Create a new ExpressRoute circuit or choose an existing circuit to authorize.
For more information about creating a new ExpressRoute service key in the Azure console, see the Microsoft documentation.
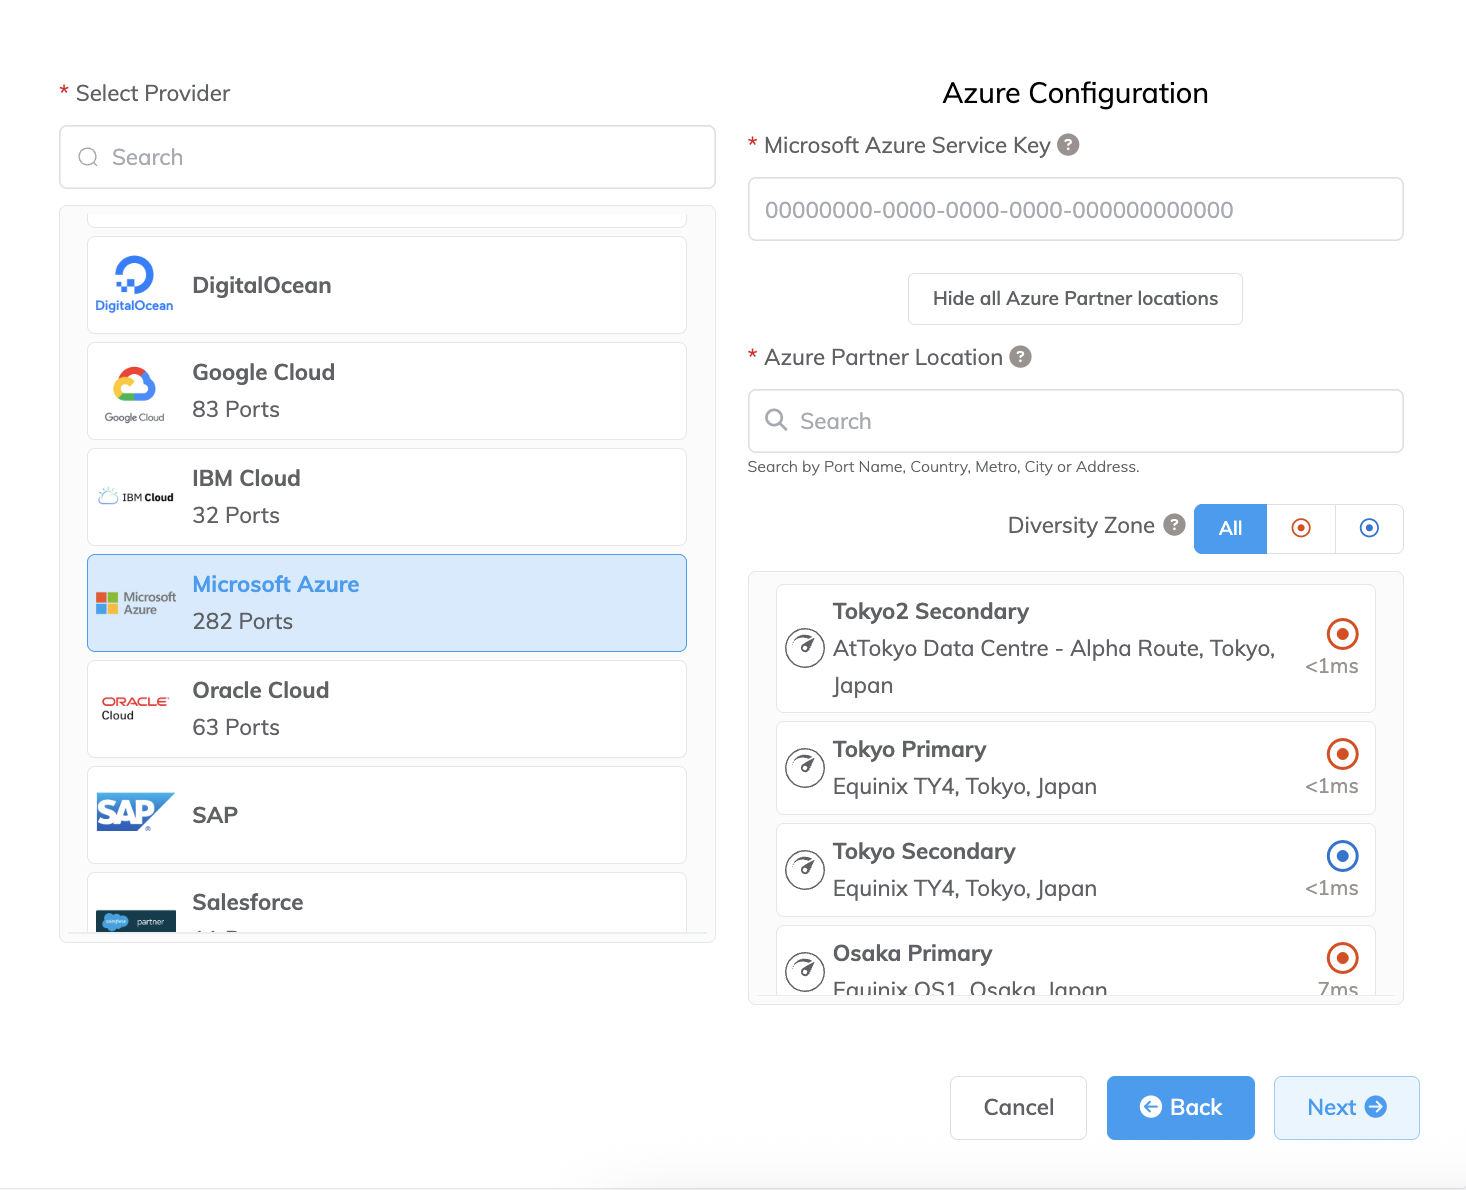
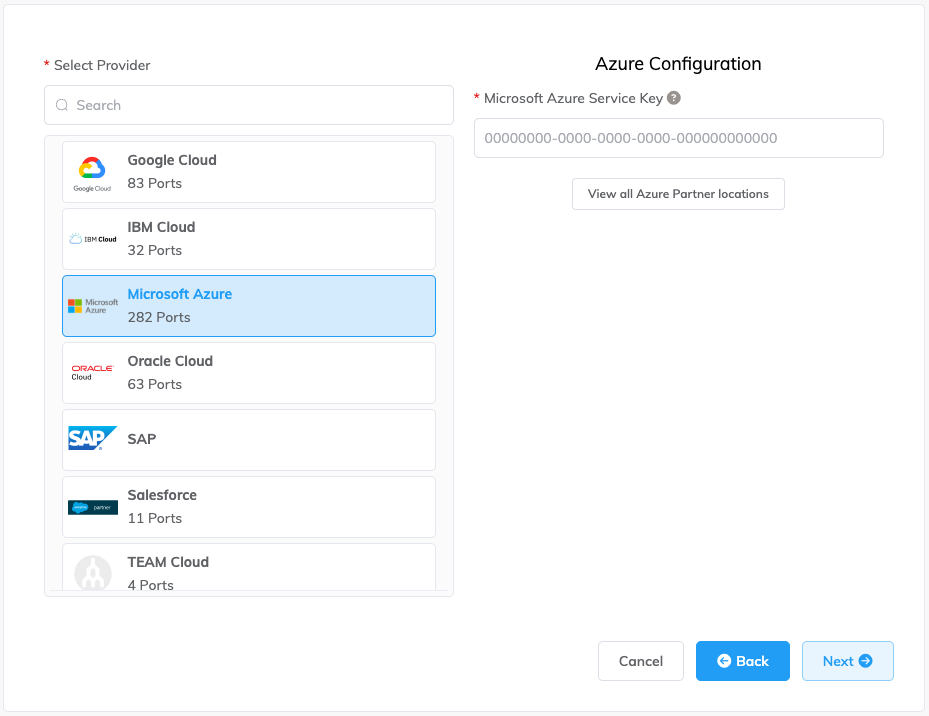
To check the latency and price of connecting to a particular Azure Partner location, start the procedure to add a connection to Microsoft Azure but instead of providing a Microsoft Azure Service Key, click View all Azure Partner locations. You can proceed to the Connection Details page without a service key and review the pricing of the selected port. To place an order for a Microsoft Azure connection, you need to provide a service key.
-
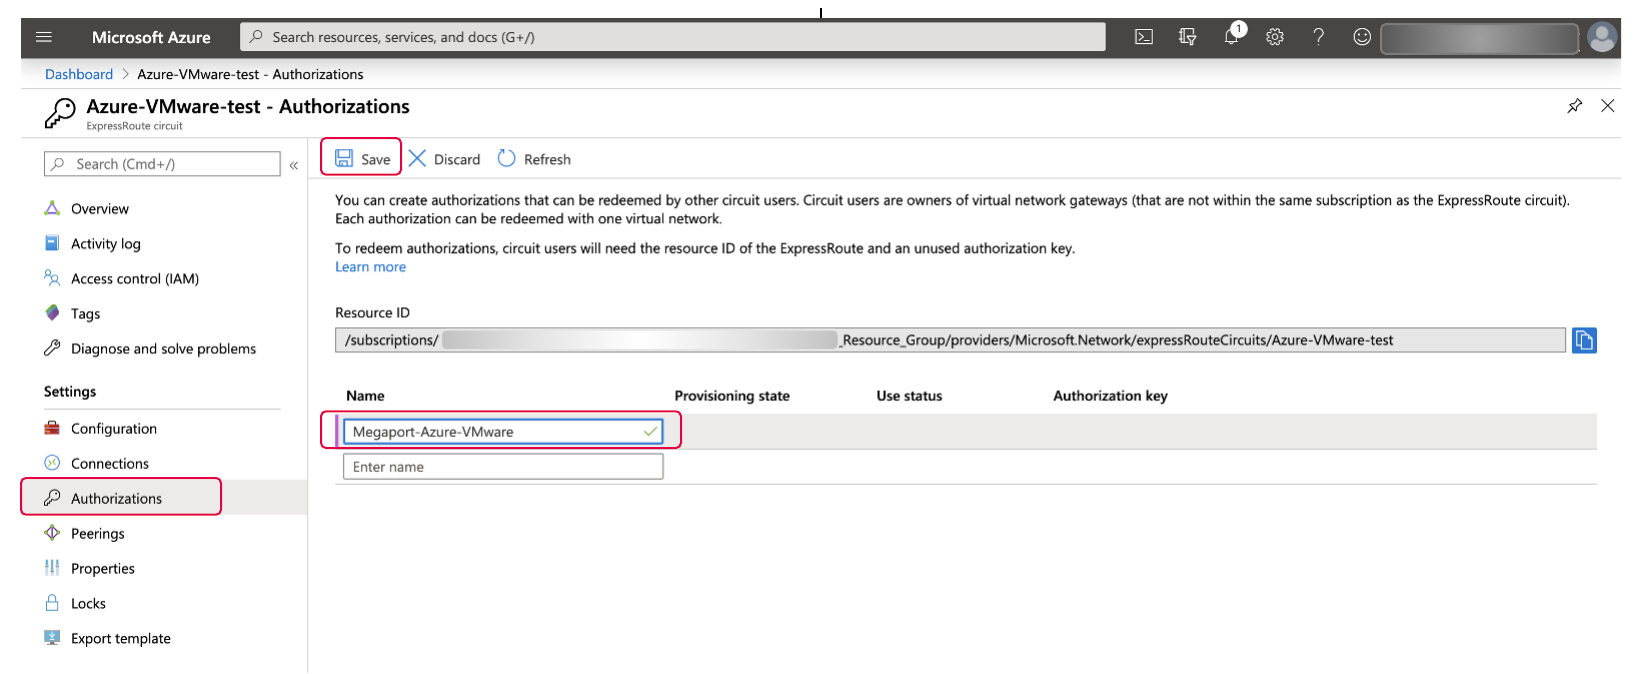
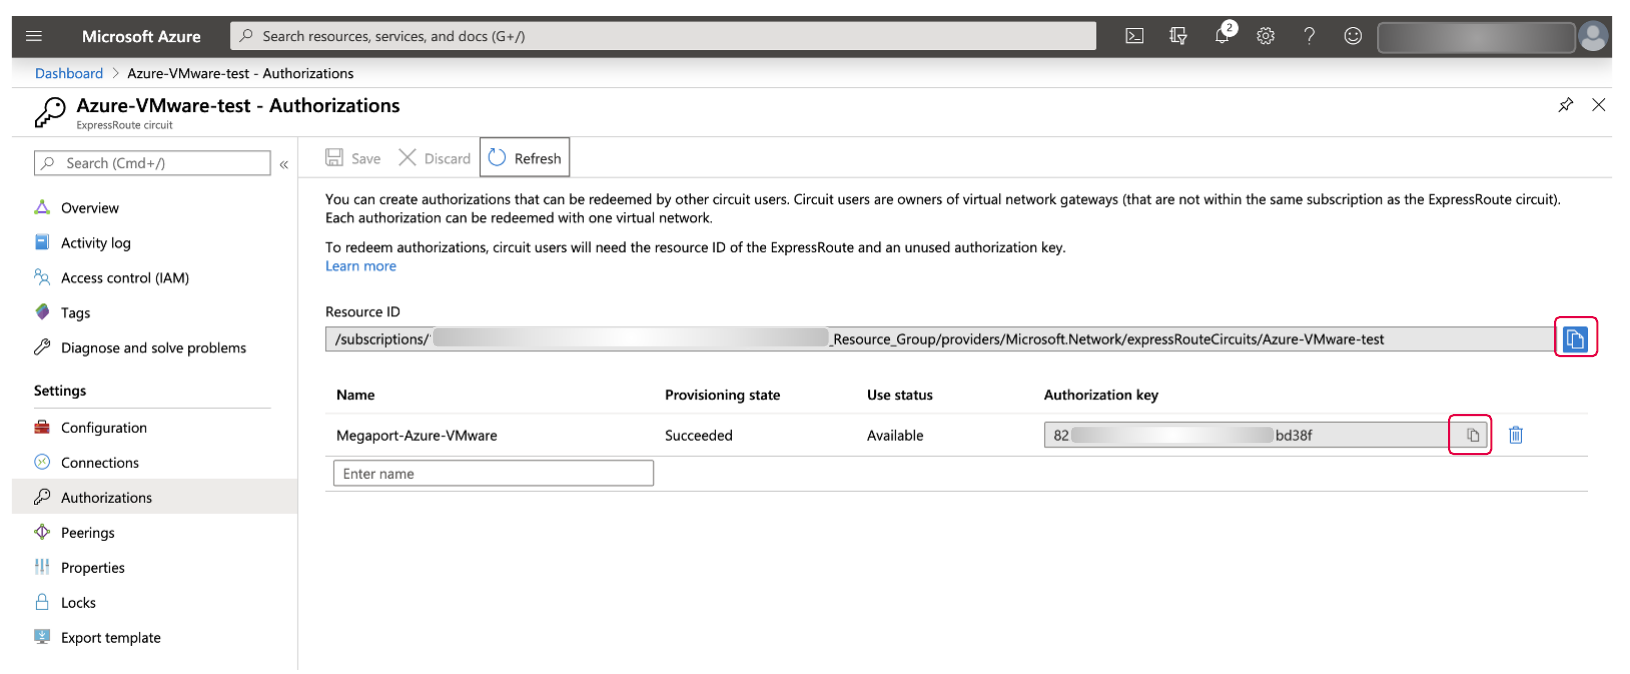
Once you have selected the circuit to authorize, select Authorizations from the navigation bar, enter a name for the authorization, and click Save.
-
Click Refresh.
-
Copy the Resource ID and the Authorization key and paste them into a text file.
-
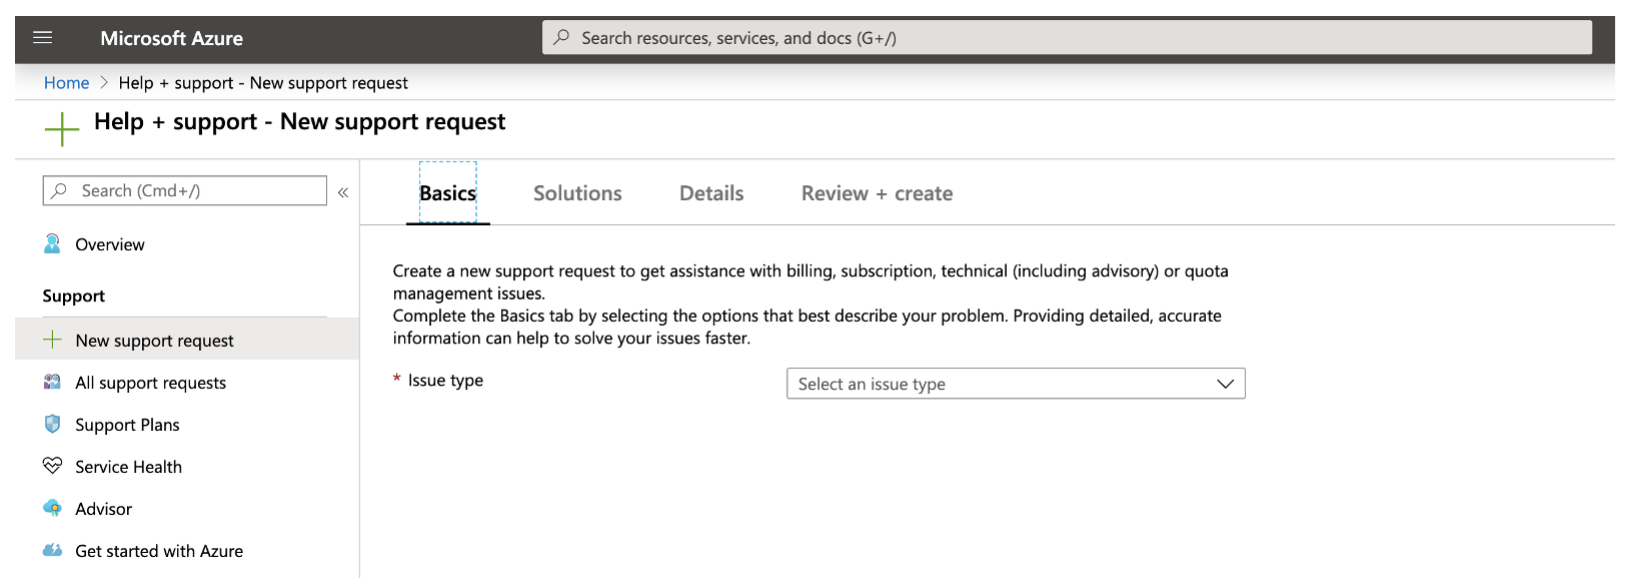
Create a Support ticket in the Azure console. Search for Support and then select + New support request.
-
Complete the Support ticket details as follows:
- Issue type – Technical
- Subscription – Where you want to deploy the CloudSimple service
- Service – VeloCloud Solution by CloudSimple
- Problem type – Service Request
- Problem subtype – Create ExpressRoute connection to on-premises
- Additional details to provide:
- Authorization key and resource ID that you previously copied into a text file
- A /29 IP network for the transit network
- Whether you are sending default routes over ExpressRoute
- Whether the Private Cloud traffic should use the default routes
Integrating Megaport with VeloCloud Cloud on Azure
Once you have completed the ExpressRoute authorization process, you can use the Megaport Portal to create the VXC to the VeloCloud Cloud on Azure environment. Once you have completed the ExpressRoute authorization process, you can use the Megaport Portal to create the VXC to the VMware Cloud on Azure environment.
To integrate Megaport with VMware Cloud on Azure
-
In the Megaport Portal, go to the Services page and select the Port you want to use.
-
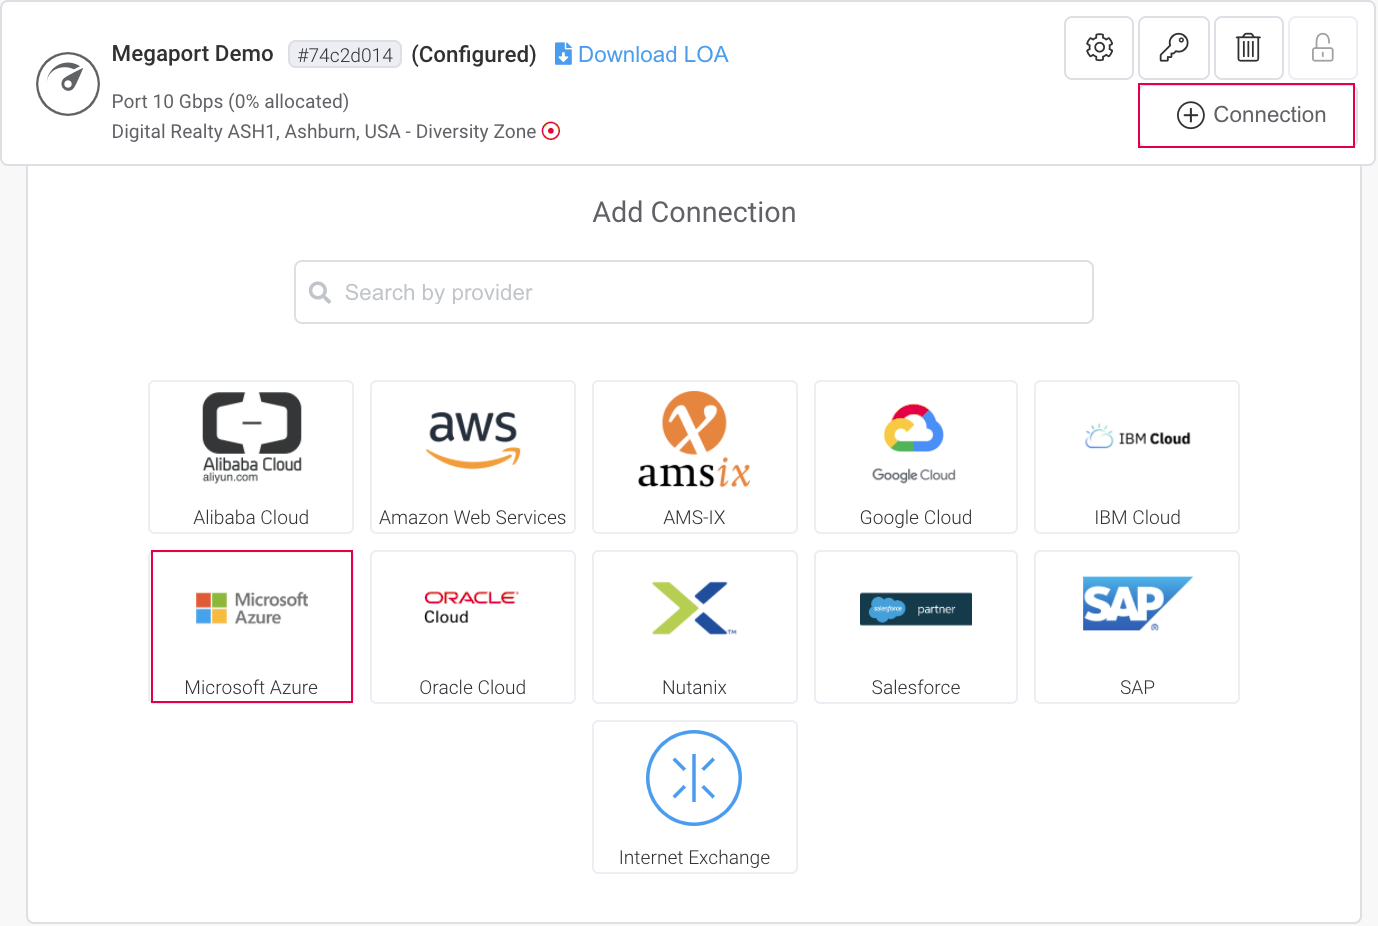
Add an Azure connection for the Port.
If this is the first connection for the Port, click the Microsoft Azure tile. The tile is a shortcut to the configuration page. Alternatively, click +Connection, click Cloud, then click Microsoft Azure.
-
Add the ExpressRoute service key into the Microsoft Azure Service Key field.
For more information about creating a service key, see the Microsoft documentation.
After the Portal verifies the key (in approximately 5 seconds), you will be presented with Primary and Secondary on-ramp options into the Azure infrastructure.
-
Choose the Primary option and click Next.
-
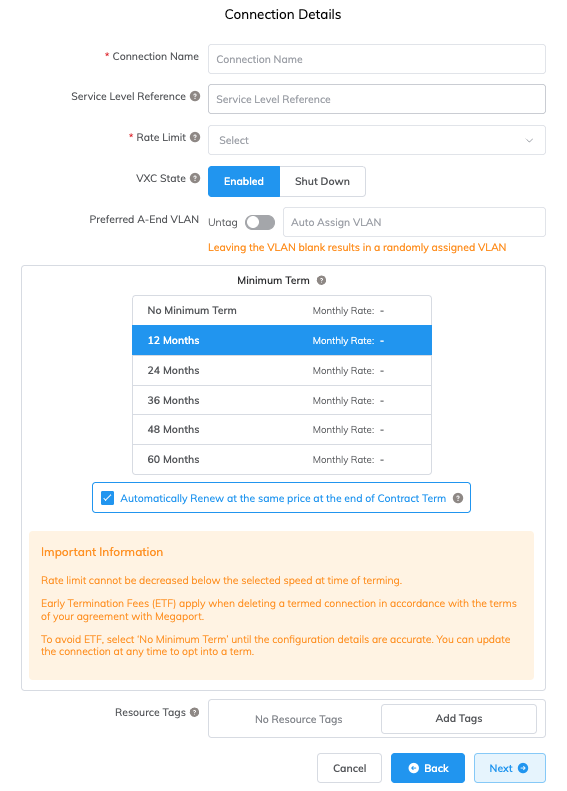
Specify the connection details:
-
Connection Name – The name of your VXC to be shown in the Megaport Portal.
-
Service Level Reference (optional) – Specify a unique identifying number for your Megaport service to be used for billing purposes, such as a cost center number, unique customer ID, or purchase order number. The service level reference number appears for each service under the Product section of the invoice. You can also edit this field for an existing service.
-
Rate Limit – The speed of your connection in Mbps. This populates automatically based on the rate defined with the service key.
-
VXC State – Select Enabled or Shut Down to define the initial state of the connection. For more information, see Shutting Down a VXC for Failover Testing.
Note
If you select Shut Down, traffic will not flow through this service and it will behave as if it was down on the Megaport network. Billing for this service will remain active and you will still be charged for this connection.
-
Preferred A-End VLAN – Specify an unused VLAN ID for this connection. This is the S-Tag, or outer tag, associated with the Port that transparently carries the inner C-Tags for ExpressRoute. This VLAN ID must be a unique ID on this Port and can range from 2 to 4090. If you specify a VLAN ID that is already in use, Megaport will assign the next closest available value. If you don’t specify a value, Megaport will assign one.
Important
Megaport delivers ExpressRoute services to Microsoft ports using Q-in-Q. For network devices that do not support Q-in-Q, you can Untag the A-End VLAN. Untagging removes the VLAN tag for the outer connection (S-Tag), and delivers the three inner tags (C-Tags) natively as 802.1Q VLANs. Be aware that using an untagged VLAN limits that VXC to one Port. Because you cannot deploy any other VXCs on the Port, such as a secondary ExpressRoute VXC, we don’t recommend this workaround as a long-term solution. You must use untagged VLANs if you are creating a MACsec connection.
-
Minimum Term – Select No Minimum Term, 12 Months, 24 Months, 36 Months, 48 Months, or 60 Months. Longer terms result in a lower monthly rate. 12 Months is selected by default. Take note of the information on the screen to avoid early termination fees (ETF).
Enable the Minimum Term Renewal option for services with a 12, 24, 36, 48 or 60-month term to automatically renew the contract at the same discounted price and term length at the end of the contract. If you don’t renew the contract, at the end of the term, the contract will automatically roll over to month-to-month contract for the following billing period, at the same price, without term discounts.
For more information, see VXC Pricing and Contract Terms and VXC, Megaport Internet, and IX Billing.
-
Resource Tags – You can use resource tags to add your own reference metadata to a Megaport service.
To add a tag:- Click Add Tags.
- Click Add New Tag.
- Enter details into the fields:
- Key – string maximum length 128. Valid values are a-z 0-9 _ : . / \ -
- Value – string maximum length 256. Valid values are a-z A-Z 0-9 _ : . @ / + \ - (space)
- Click Save.
If you already have resource tags for that service, you can manage them by clicking Manage Tags.
Warning
Never include sensitive information in a resource tag. Sensitive information includes commands that return existing tag definitions and information that will identify a person or company.
-
-
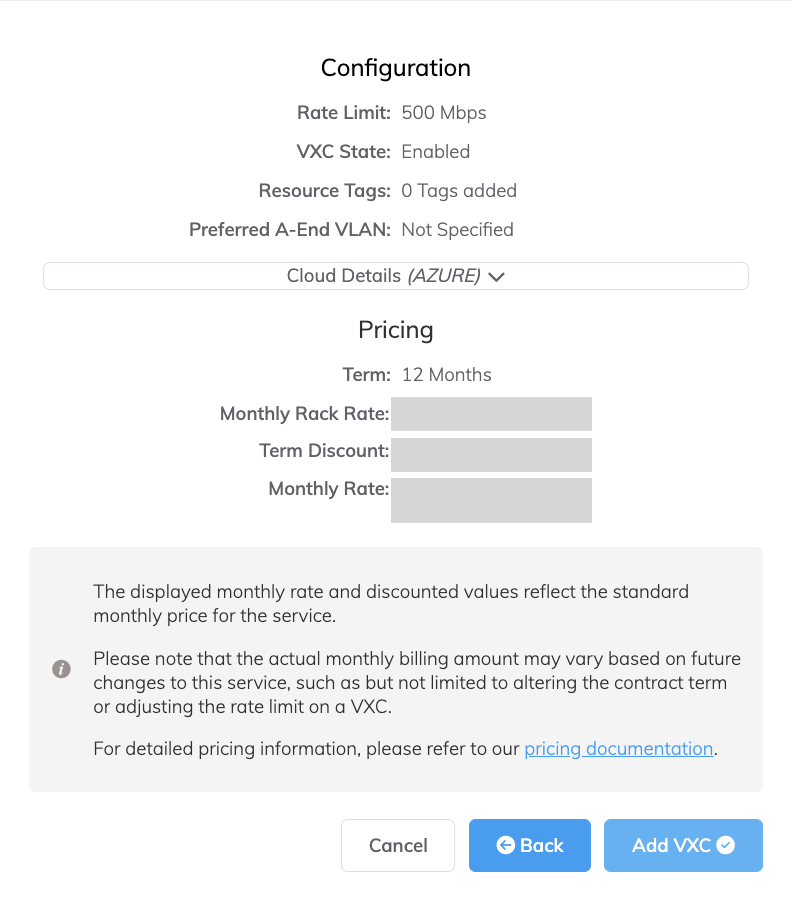
Click Next.
-
Click Add VXC on the Summary page.
-
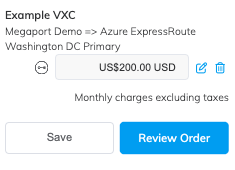
Click Review Order.
-
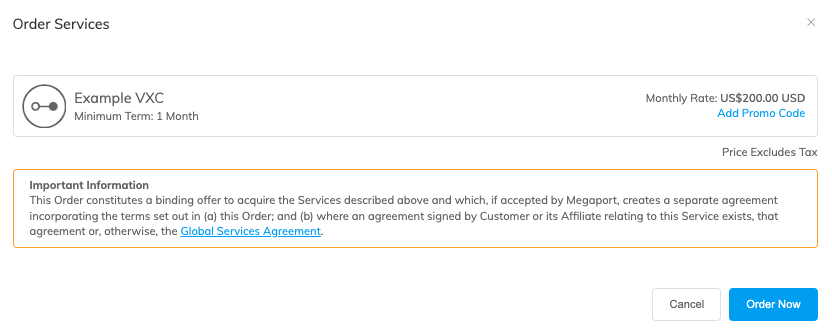
Click Order Now.
You have created a single Layer 2 connection into your Azure infrastructure.
Redundancy
You can achieve redundancy for the connectivity portion of this overall solution by establishing additional VXCs to the Azure environment. If the VXCs are implemented on separate Ports, you can achieve additional physical redundancy.
Creating a second VXC connection into your Azure infrastructure (along with the associated BGP session) will qualify the setup for Microsoft Azure’s SLA. When you paste your Microsoft Azure Service Key into the appropriate field, choose the Secondary on-ramp location (the Primary on-ramp location will be grayed out and unavailable). Follow the above process from step 5 to to complete the second VXC.
At this point, you will have created the second Layer 2 connection from your Port to your Azure infrastructure and your work in the Megaport Portal is complete.
To complete the connectivity process, log in to the Azure portal and enter the AS number, VLAN ID, and Primary and Secondary IP subnet for the Primary and Secondary BGP connections into your Azure infrastructure.
Note
Microsoft Azure requires that you use BGP to connect your on-premises environment with your Azure infrastructure. For more information about setting up Microsoft peering and private peering from your Azure console, see the Microsoft documentation.
Background information
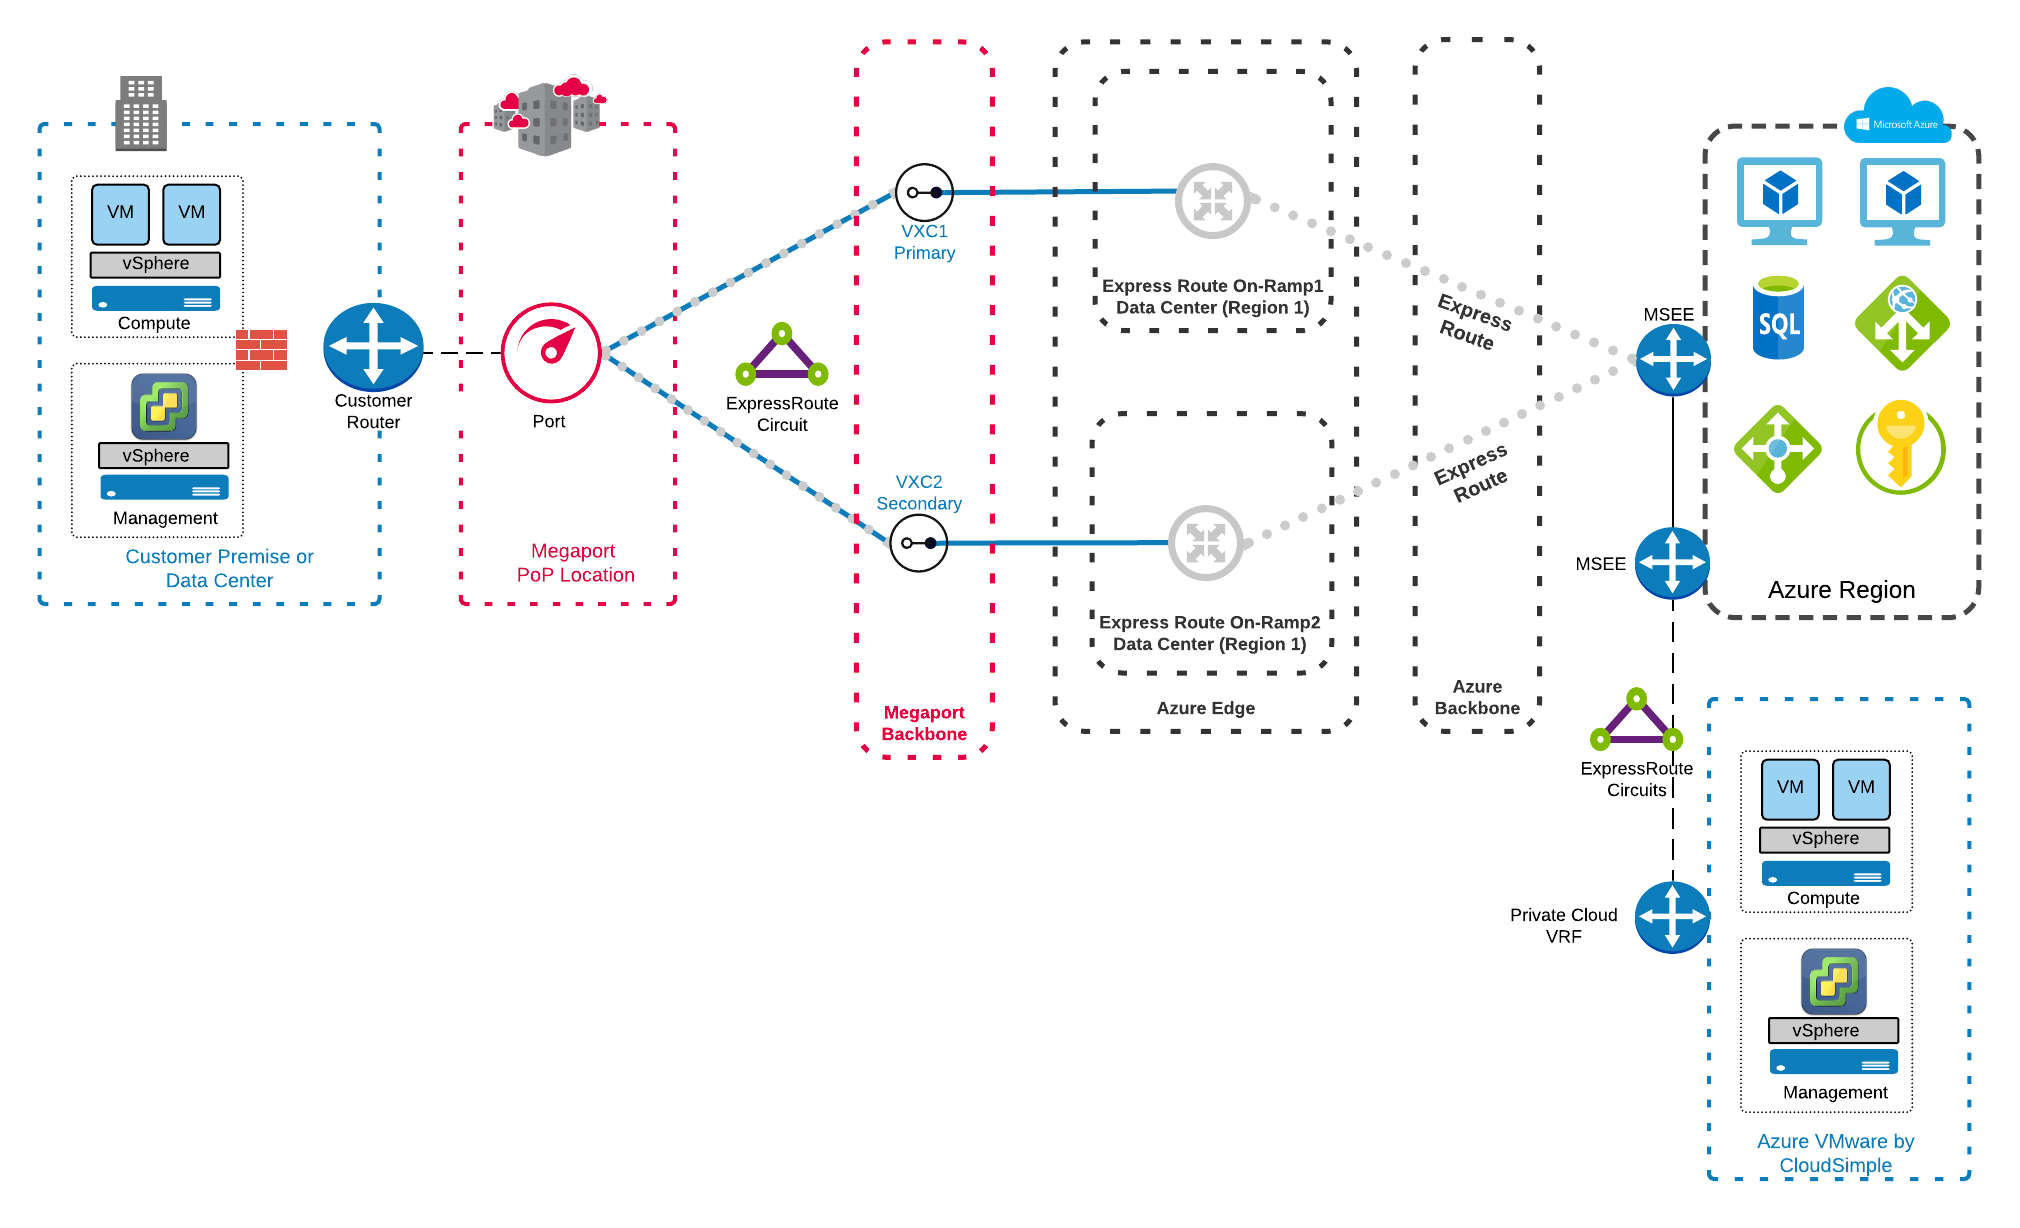
What does the architecture look like?
Azure has simplified the connectivity model using Azure ExpressRoute to reach VeloCloud Cloud by CloudSimple. Using Megaport as your Network-as-a-Service provider, you can seamlessly deploy ExpressRoute for VeloCloud consumption from your on-premises Data Center infrastructure. This image shows the components associated with an on-premises environment connecting to a Port to reach VeloCloud Cloud on Azure.
What are the benefits for an enterprise using VeloCloud Cloud?
VeloCloud Cloud provides a multitude of benefits, including the ability to take a slow and low-risk approach to cloud adoption. You can augment an existing on-premises infrastructure with cloud resources for growth purposes. This augmentation reduces the need for new capital expenditures on equipment and allows increased or decreased workloads in the cloud. If you are contemplating an eventual full migration to the cloud, you can take full advantage of existing equipment and infrastructure while it’s still in a productive and usable state.
This solution can also be incorporated into an overall disaster recovery plan by using the cloud as a primary deployment with the on-premises infrastructure used as a backup. You can reverse Primary and Backup deployment locations to align with your business requirements. For additional information on benefits of VeloCloud Cloud, see VeloCloud Solution on Azure by CloudSimple – features, benefits, and use case scenarios.
Where is VeloCloud on Azure available?
Existing Azure VeloCloud Regions by CloudSimple can be found in this FAQ.